Project Detail
Project: Blue Beauty Beach Unit 02
Equipments: Turbine Flow Metters
Date: March 2019 to June 2019
Vendor Location: Fabricator of Turbine Flow Metters in Chihuahua, Mexico.
Final Inspection per ITP-386590 Rev C Item IX and Drawing TFM-B55112-01 Rev C.
Items Inspected: Turbine Flow Metter Serial Number N15-TFM-3276.
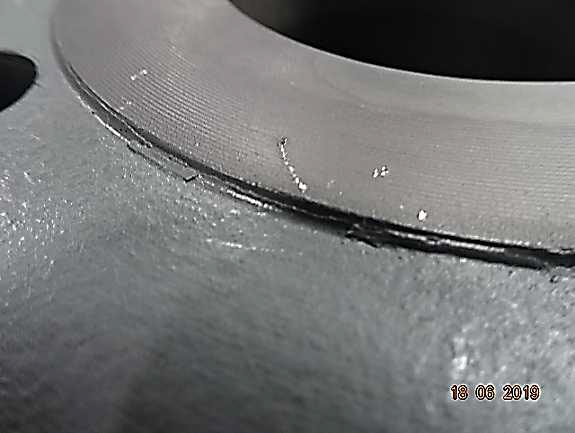
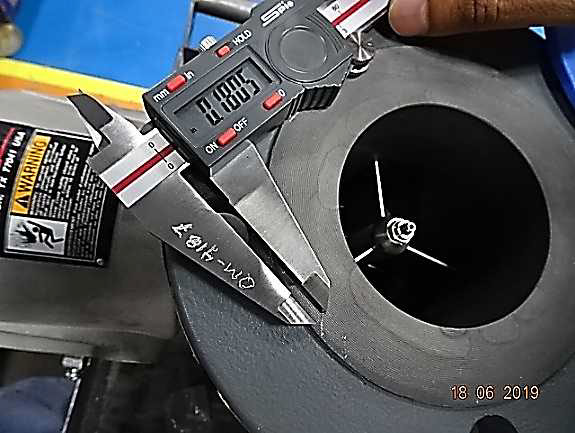
Findings: Referenced Turbine Flow Meter observed with imperfections on Flange Facing Finish (Gasket Seat) of 0.180” long which exceed the Maximum allowable dimension of radial projection of 0.059” for imperfections referenced in section 6.4.6 and Table 3 (Table II-3 of Mandatory Appendix II) from ASME B16.5 Standard for Flanges 3”-150#. Vendor Team has decided to Rework the affected Flange Facing Finish by Machining.
Re-Inspection: After Rework, Flange Facing Finish has been measured and found at 234 Micro Inches as Average Roughness, as well the Height of Raised Face measured and found at 0.049”, both Dimensions Acceptable to ASME B16.5 Standard. Also, Hydrostatic Test has been conducted again on referenced Turbine Flow Metter with aceptable results. See Photos as Illustration on Described issue as originally found.
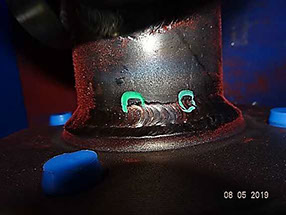
Witness on Magnetic Test Examination per Inspection and Test Plan ITP-386590 Rev C Item VIII, MT Examination Procedure Number BB0356-03 Rev 2, Customer Inspection Requirements BB-285-IQS-783400 Rev 1 Item 30-40 and Customer Specification-68-BBUU-020 Rev 3.
Items Inspected: Turbine Flow Metters Tag Number T04BN72DB3GHCL2, 11 of 24 pieces Examined by MT.
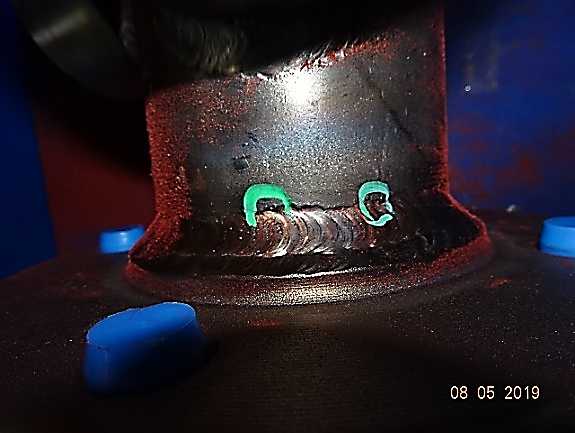
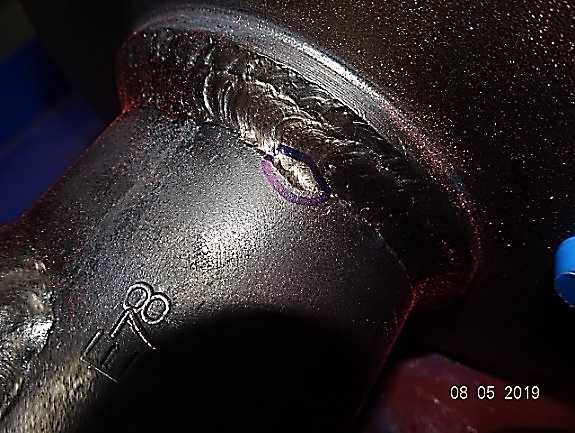
Findings: Eight pieces identified as 3, 4, 5, 6, 12, 16, 17 and 22 observed with unacceptable defects such as undercuts, overlaps and cracks type crater.
Re-Inspection: All defective áreas were repaired by welding/grinding and examined again by MT with aceptable results. See Photos on typical issues as Described.
Review on NDT Examination Requirements per ITP-386590 Rev C Item VIII and Customer Specification 68-BBUU-020 Rev 3.
Items Inspected: Turbine Flow Metters Tag Number T04BN72DB3GHCL2.
Findings: Observation from Fraza Team: On the Turbine Flow Metters being Examined by Magnetic Test, there are two welds of end flanges to pipe which are feasible to be MT Examined since they are fabricated from magnetic Carbon Steel Material, however there are other two welds from Pads in Austenitic Stainless Steel to Pipe in Carbon Steel welded with a Austenitic Stainless Steel filler Metal AWS Classification ER-309, considering this austenitic material, these welds are not magnetic, therefore they are not feasible to be MT Examined. In opinion from Fraza Team, these No Magnetic Welds would have to be examined with Dye Penetrant Test in accordance with Section 8.4 of Specification 68-BBUU-020 Rev 3 referenced above.
Re-Inspection: Considering the observation from Fraza Team, Customer has confirmed, Dye Penetrant Testing shall be applied for Referenced Non-Magnetic Welds, As subsequently done by Vendor.
Benefits to Our Customer: By using Fraza Inspection Team, Customer saved a lot of of time and money preventing excessive expenses per back charges for Re-works at field site per unacceptable issues on Welding, Incorrect Method of Non-Destructive Testing and Damaged Gasket Seating of flanges for Field Connections, If Not Corrected/Repaired in timely manner at Vendor Shop.

© 2019 Fraza Inspection Company - All Rights Reserved


