Pumps

CONTRIBUTIONS TO OUR CUSTOMERS

c

f

i


Project #1

Project #2

Project #3

Project #4

Project #5

Project #6

Project #7

Project #8

Project #9

Project Detail

Project: Beauty High Mountain Unit 03

Equipment: Pumps

Date: September 2018 - May 2019

Vendor Location: Fabricator of Pumps in Estado de Mexico, Mexico.

Item #1

Item #2

Item #3

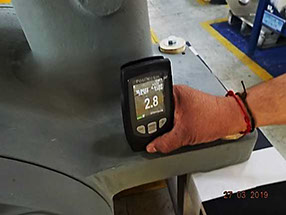
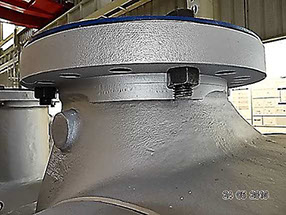
Review on Paint Systems per Vendor ITP 790033-010 Rev 2, Item 2.1 and Approved Painting Procedure BHM-040-R-050A Rev C.

Item Inspected: Pump Tag BHM-60-T-0310-A/B/C.

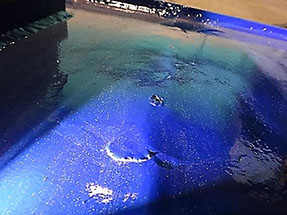
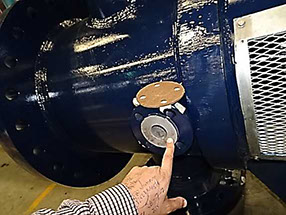
Findings: Specified Paint Systems per Approved Painting Procedure BHM-040-R-050A Rev C are as follows: Casing and Cover, Paint System BHCS-22C- Surface preparation: Clean to SSPC-SP1-Primer: International Paints Intertherm 751 CSA(25-65 microns). Bearing Housing, Paint System BHCS-4A, Surface preparation to Sa3, Primer, Hempel Paints Hempadur 85671 or International Paints Inter Line 399(95-125 microns). Due to a lack of communication between Main Vendor and Manufacturer in Mexico, Wrongly, a Paint System per Paint Specification BQS-760033-0010 Rev 0, with Primer, International Interzinc 22(50-80 microns) has been applied by Mexican Manufacturer on Casing, Cover and Bearing Housing.

Re-Inspection: Per Customer Disposition, Casing, Cover and Bearing Housing have been Re-Blasted and Re-Painted in accordance with Paint Systems per Approved Painting Procedure BHM-040-R-050A Rev C referenced Above. See Photos before and After Re-work on Paint.

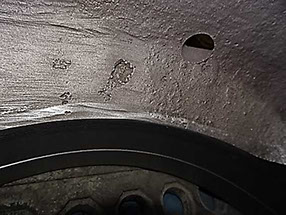
Visual Inspection  per Vendor ITP 790033-020 Rev 2, Items 1.1, 1.4, 1.5, Data Sheet BHM-700033-020 Rev C and Standard MSS-SP-55.

Item Inspected: Pump Tag  BHM-70-R-0209-C/D, Volute Case Part Number 30.101- Traceability Code T58695 Heat Number 8153144.

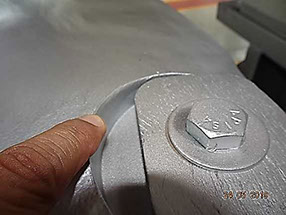
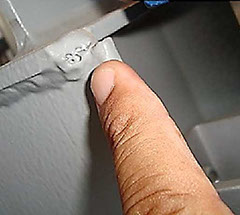
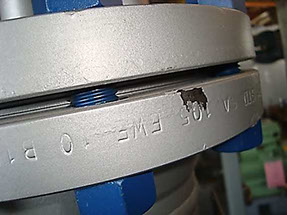
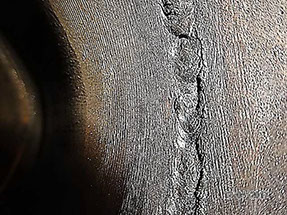
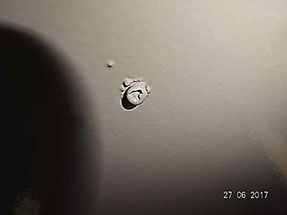
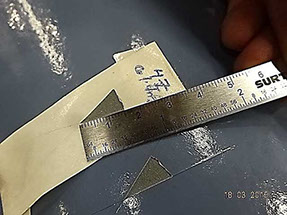
Findings: Two areas on casting surfaces of Volute Casing observed with surface irregularities exceeding the example “a” and ”b” of defects Type Gas Porosity and Sand Inclusions from Standard MSS-SP-55, Not acceptable to Project Requirements referenced Above.

Re-Inspection: All referenced surface irregularities have been repaired by Vendor to bring them within project specifications. See Photo on Referenced Issue.

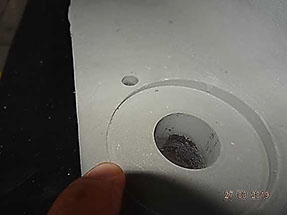
Visual Inspection on Surface Preparation per Vendor ITP 790033-030 Rev 2, Item 3.6 and Approved Painting Procedure BHM-040-R-050A Rev C.

Item Inspected: Pump Tag BHM-80-T-0620-A/B/C.

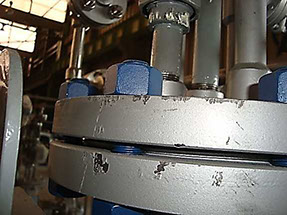
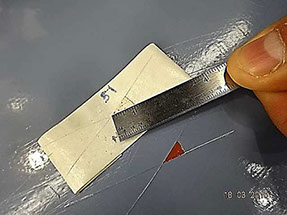
Findings: Per Section 7.8.2 from Approved Painting Procedure referenced above, Prior to blasting, rough welds and sharp edges shall be ground to a minimum radius of 3 mm to ensure proper coating application. However after Primer Coating Application, several áreas from casting and machined surfaces still were observed with Sharp edges Not ground to a minimum radius of 3 mm as specified.

Re-Inspection: Corrections to get Rough Welds and Sharp edges ground to a minimum radius of 3 mm, Completed by Vendor. See Photos as illustration on referenced Issue before and after Corrections.

Benefits to Our Customer: By using Fraza Inspection Team, Customer saved a lot of of time and money preventing excessive expenses per back charges for Re-works at field site per unacceptable issues on Surface Preparation, Painting and Not Compliance to Project Specifications, If Not Corrected/Repaired in timely manner at Vendor Shop.

Project Detail

Project: Bankok West Project Unit 02

Equipments: Reflux Pumps

Date: July 2009 - March 2010

Vendor Location: Pumps Fabricator in Estado de Mexico, Mexico.

Item #1

Visual Inspection per ITP-11623-0030 Rev 2, Item 2.2, GA Drawings GA-6230030-01 Rev B and Vendor Paint Specification QPS-1623-0030 Rev 1.

Item Inspected: Pump Tag GHP 47B-

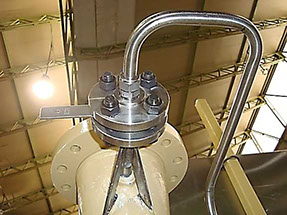
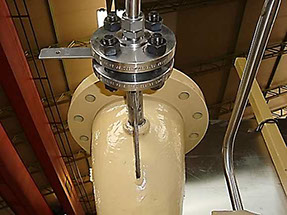
Findings: ¾¨ Nozzle-Connection on Plans was found gusseted only in one location no in accordance with applicable Fabrication Drawing which specifies for gusseting in two locations. Vendor has repaired on Pump GHP-47B to place and weld a 2nd gusseting on referenced Nozzle as specified. Fraza Team has informed to Vendor Attendee that in accordance with API-610 Standard Section 5.4.3.5 if a repair by welding is done after Hydrotest, then an additional Hydrotest is required. Customer has confirmed a Re-Hydrotest must be conducted per Welding Done after original Hydrotest in accordance with API-610 Requirements referenced above.

Re-Inspection: New Hydrotest conducted by vendor as per Customer Disposition. See photos below as illustration on referenced issue as originally found.

Benefits to Our Customer: By using Fraza Inspection Team, Customer saved a lot of of time and money preventing excessive expenses per back charges for Reworks at field site per unacceptable issues on wrong gusseting of Connection Nozzles, If Not Repaired in timely manner at Vendor Shop.

Project Detail

Project: Bankok West Project Unit 03

Equipments: Reflux Pumps

Date: July 2009 - March 2010

Vendor Location: Pumps Fabricator in Estado de Mexico, Mexico.

Item #1

Review on RT Examination per ITP-1852-0010 Rev 5, Item 6.2, GA Drawings GA-8520010-01 Rev B and Customer Specification NT-20-05-03 Table 3.

Item Inspected: Pumps Tag NTP 59A/B, Casings-31898-1/2

Findings: RT Examination Reports does not reflect on RT Exposures for Critical Areas Number 3, 4 and 5 as required to be RT Examined per Sketch of Vendor ITP Rev 5 and Customer Spec NT-20-05-03 Table 3. Vendor has confirmed unfortunately for some reason RT Examination on referenced Critical Areas has been omitted. Per Customer Disposition on Issued NCR, the referenced pumps have been disassembled in order to complete the RT Exposures on referenced Critical Areas. RT done with aceptable results. See Photo on RT Examination as Completed per Fraza Team Observation.

Project Detail

Project: Blue Lake Refinery

Equipments: Pumps

Date: February 2011 - December 2011

Vendor Location: Fabricator of Pumps in Estado de Mexico, Mexico.

Item #1

Item #2

Item #3

Item #4

Final Inspection per ITP-14743-0010 Rev 3 Item 16.2, Drawing GA-14743-0020 Rev B and Customer Specification-SERJ-I-003 Rev 2.

Item Inspected: Pump Tag 019-R-0034C.

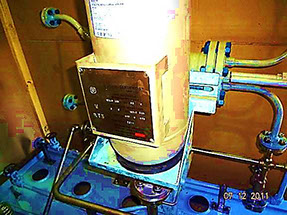
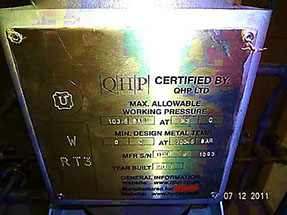
Findings: Plan 53B, Acumulator CD-04001703009, observed with No ASME Stamp Nameplate to support fabrication under ASME Code Requirements, as specified on GA Drawing referenced above.

Re-Inspection: The referenced Acumulator Vessel has been fabricated again under ASME Code Requirements as reflected on installed ASME Nameplate. See Photos on Installed Nameplate reflecting on ASME Code Stamp.

Visual Inspection per ITP-14743-010 Rev 3 Item 2.2 and Drawing GA-14743-010 Rev B.

Item Inspected: Pump Tag 013-R-0026A/Tag 014-R-0027B/Tag 015-R-00028A/Tag 016-R-0029B-GA.

Findings: Beam Support of Plan 21-Cooler observed with gusset welds Not properly tied into adjacent welds and with pieces of unconsumed filler metal.

Re-Inspection: Repairs completed by Vendor. See photo as illustration.

Visual Inspection on Paint per ITP-14743-0010 Rev 3 Item 12.2, Drawing GA-14743-0030 Rev B, Vendor Paint Specifications RMS20014743-0010-01 Rev 5 and Customer Specification-SERJ-I-003 Rev 2.

Item Inspected: Pumps Tag 017-R-0029C/Tag 018-R-0030B.

Findings: Plan 21-Cooler Vessel observed with 6¨-WNRF and Blind Flanges with no surface preparation per specified cleaning  ISO-Sa-2.5 (SSPC SP10) since the applied painting is showing lack of adherence, getting off, leaving discovered the substrate no surface prepared.

Re-Inspection: Vendor has completed on repairs by re-blasting and painting on such areas in accordance with requirements per Project Documents referenced above. Addressed by Vendor. See photos as illustration.

Visual and DFT Inspection on Paint per ITP-14743-0010 Rev 3 Item 12.2, Drawing GA-14743-0020 Rev B and Customer Specification-SERJ-I-003 Rev 2.

Item Inspected: Pumps Tag 018-R-0031C/Tag 018-R-0032B.

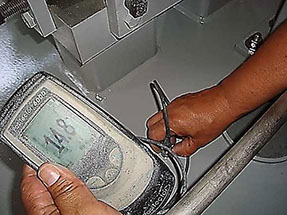
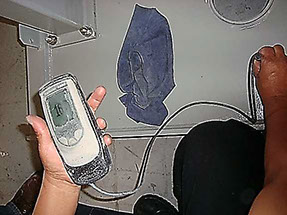
Findings: Carbon Steel Pump Parts and Top Surface of Base Plate. Specified Total DFT Range per Vendor Paint Spec above: 8.0 to 12.0 Mils: Actual DFT Measurements: 11.5, 13.8, 14.5, 16.3 and 15.7 Mils Total Average-14.3 mils. Out of Tolerance to Customer Specification-SERJ-I-003 Rev 2 and SSPC-PA-2 Standard.

Re-Inspection: Vendor has completed on repair to bring final DFT within tolerances per Project Specifications. See Photos on referenced Issue.

Benefits to Our Customer: By using Fraza Inspection Team, Customer saved a lot of of time and money preventing excessive expenses per back charges for Re-works at field site per unacceptable issues on welding, surface preparation, painting and Not Compliance to ASME Stamping Requirements, If Not Corrected/Repaired in timely manner at Vendor Shop.

Project Detail

Project: Bankok East Project

Equipment:  Reflux Pumps

Date: July 2009 to March 2010

Vendor Location: Pumps Fabricator in Estado de Mexico, Mexico.

Item #1

Visual Inspection on Surface Preparation per ITP-11416-0040 Rev 6, Item 2.8, GA Drawing GASY-114160040-01 Rev D and Customer Paint Specification QPS-11416-0010/40 Rev 0.

Item Inspected: Pump Tag RNP 35A Case and Cover Assembled together.

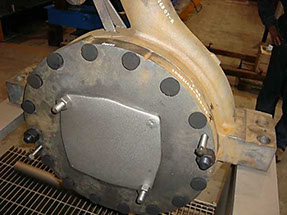
Findings: Cover found installed/bolted to Case, as per vendor this done to protect the internal machined surfaces of the Pump Case from the Blasting action: The exposed CS Surfaces between the interface of Case and Cover will not receive the required blasting preparation and painting spray since the gap between both parts is extremely closed, therefore the blast media as well the paint spray will not reach properly these areas to ensure a complete blast and paint Coverage.

Re-Inspection: Attending the observation from Fraza Team, Vendor has finally addressed to make sure a full coverage from blasting and painting on referenced áreas has been achieved. See photo below.

Benefits to Our Customers: By using Fraza Inspection Team, Customer saved a lot of of time and money preventing excessive expenses per back charges for Reworks at Field Site per unacceptable issues on surface preparation and painting, If Not Corrected/Repaired in timely manner at Vendor Shop.

Project Detail

Project: High Land Unit 03

Equipments: Pumps

Date: December 2016 - September 2017

Vendor Location: : Fabricator of Pumps in Nuevo Leon, Mexico.

Item #1

Item #2

Item #3

Item #4

Item #5

Item #6

Verification and Visual Inspection on Bolting Grades per ITP-3856-A/R  Rev C Item 15.

Items inspected: Pump Tag P-3856 A/R.

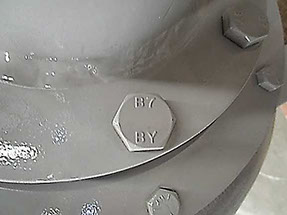
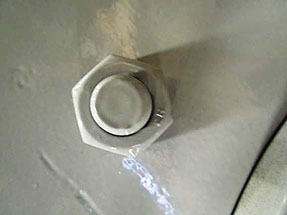
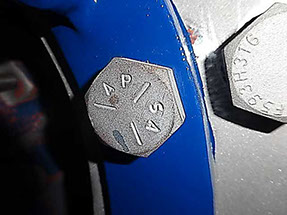
Findings: All Bolts installed on interfaces of column pipes, Motor support and Case Cover found in SS and CS Grades not in compliance with Cross Sectional Drawings.

Re-Inspection: All Wrong Bolts/Nuts have been removed and Specified Bolts ASTM A-193 B7 and Nuts ASTM A-194-2H have been Installed in accordance with Cross Sectional Drawings and Material Requisition 28569-HL-134156-02 Rev 0 Section 4.3. See Photos on right bolts/nuts as installed.

Visual Inspection per ITP P-3845-A/R-196543-HL-0030 Rev 3 Item 3, Welding Specification WS-U-005 Rev 2 and Cross Sectional Drawing 833430088 Rev C.

Item inspected: Pump Tag 3845 A/R, Part Number 54010291, Column Pipe.

Findings: Buttweld of Reducer 4"-6" to Elbow 4"-Inside, observed with No Complete Joint Penetration(Underfill) and Excessive Undercuts. Not Acceptable to Customer Welding Specification WS-U-005 Rev 2 Section Number 5.0, which specifies "All buttwelds shall be full penetration and Root Pass shall be deposited by GTAW Process".

Re-inspection-repairs completed by vendor in compliance to Project requirements referenced above. See Photo on referenced issue

Visual Inspection per ITP-P3845-A/R-196543-HL-0030 Rev 3 Item 3 and Detail Drawing 80971104-03 Rev 0.

Items Inspected: Pump Tag 3848 A/R, Part Number, 5410250-07, Column Pipe.

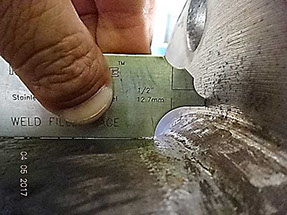
Findings: Joints Flange to Pipe, specified CJP plus Fillet Weld Size ½”, Actual as measured, Undersized fillet weld 1/4” to 5/16”. Also Extra Undersizing per Over-Machining done on referenced  Fillet Weld.

Re-inspection-repairs completed by vendor in compliance to Project requirements. See Photo on referenced Issue.

Visual and DFT Inspection on Painting per ITP-P3845-A/R-HL-0030 Rev 3 Item 12, Cross Sectional Drawing 8734340023 Rev 03 and Painting Spec HL-T-588-01 Rev 2.

Items Inspected: Pump Tag 3850-A.

Findings-A spot Inside Header near Top Flange showing burn-through(Damaging on Base Metal), probably produced during Fabrication.

Re-inspection-repairs completed by vendor in compliance to Project requirements. See Photo on described issue.

Review of Documentation per ITP P-3852-A/R, Rev B Item 14.

Item Inspected: Pump Tag P-3852-A/R, Specified PT Examination on Impeller and Shaft per Data Sheet 198591-230132-01-DS-0080 Rev 2.

Findings-PT Examination for Shaft had originally been omitted by Vendor.

Re-Inspection: Referenced PT Examination on Shafts has been conducted on all Pumps as confirmed on Reports provided for Review. Details reviewed on PT Examination Reports, Acceptance Criteria, Reflected as G3-4, ASME VIII Div 1 Appendix 8, Extent of Examination, all accessible areas, Test Results, aceptable, everything satisfactory to Project Requirements.
Documentation Review per ITP P-3854-A/R  Rev C Item 16.

Items Inspected: Pump Tag P-3854-A/R. MT Examination specified for Castings and Discharge Pipe accessible welds per Data Sheet 198591-230132-DS-0070 Rev 2, Note 16.

Findings: MT Examination for accessible welds of Discharge pipe had originally been omitted by Vendor.

Re-Inspection: Referenced MT Examination on Discharge pipe accessible welds has been conducted on Pumps as confirmed on Report provided for Review. Details reviewed on MT Examination Reports, Acceptance Criteria, Reflected as G3-2, ASME VIII Div  1 Appendix 6, Extent of Examination, all accesible welds, Test Results, Acceptable, everything acceptable to Project Requirements.

Benefits to Our Customer: By using Fraza Inspection Team, Customer saved a lot of of time and money preventing excessive expenses per back charges for Re-works at field site per unacceptable issues on Wrong Materials, Omitted NDT Examinations and Welding, If Not Corrected/Repaired in timely manner at Vendor Shop

Project Detail

Project: High Land Unit 02

 Equipments: Pumps

Date: July 2014 to October 2014

Vendor Location: Fabricator of Pumps in Nuevo Leon, Mexico.

Item #1

Item #2

Verification and Visual Inspection on Bolting Grades per ITP P-4358-A/R  Rev C Item 15 and Cross Sectional Drawing 567-AR-077-01 Rev C.

Items inspected: Pump Tag P-4358 A/R.

Findings: Galvanized Pressure Containing Bolts observed installed on interfaces of Casing to Cover, Not Satisfactory to Referenced Cross Sectional Drawing.

Re-Inspection-Vendor has removed all wrong Galvanized Pressure containing Bolts and other ones in Stainless Steel Material as specified have been installed. See Photo of Galvanized Bolts originally Installed.

Visual Inspection per ITP P-4360-A/R  Rev C Item 16.

Item Inspected: Pump Tag 4360A/R Base Plates.

Findings: Base Plate of both Pumps observed with Critical Damagings on Base Metal and evidences from a Major Repair done by welding/grinding without previous approval from Customer, Not Acceptable to Material Requisition 28569-HL-134156-02 Rev 0 Section 7.4 and PO Project Requirements.

Re-Inspection: Per Customer Disposition, the referenced Base Plates have been scrapped and other new ones have been fabricated in accordance with Project Requirements. See potos on described Issues.

Benefits to Our Customer: By using Fraza Inspection Team, Customer saved a lot of of time and money preventing excessive expenses per back charges for Re-works at field site per unacceptable issues on Wrong Materials and Not Proper Fabrication, If Not Corrected/Repaired in timely manner at Vendor Shop.

Project Detail

Project: Beauty Valley Unit 01

Equipments: Vertical Pumps

Date: March 2015 to April 2015

Vendor Location: Fabricator of Pumps in Nuevo Leon, Mexico.

Item #1

Witness on Adhesion Test on Completed Paint System Item A5M.06 per Customer Paint Specification BV5481 Rev D, Vendor Paint Procedure BV-934-01 Rev 01 and Standard ISO 12944-5:2007(E)-Corrosivity Category C5M.

Items Inspected: Columns and Motor Support.

Findings: Adhesion Test Results: Items with test spots showing Peeling(Flaking), Item 223702527 Middle Column, Item 223702530 Upper Column and Item 223702533 Motor Support, Not Acceptable to Section 7.3.2.7 of Vendor Procedure BV-934-01 Rev 01. Failed Results reflect a poor condition of adhesion of the paint film on tested areas, which can be caused by an irregular and inappropriate surface preparation or an irregular anchorage profile.

Re-Inspection: Fraza team has recommended to Customer to blast mínimum to SSPC SP 6 Commercial Cleaning all ítems with rejected adhesión test in order to achieve a suitable and reliable condition of adhesion. Subsequently addressed by Customer. See Photos on Adhesion Test Spots.

Benefits to Our Customer: By using Fraza Inspection Team, Customer saved a lot of of time and money preventing excessive expenses per back charges for Re-works at field site per unacceptable issues on an irregular and inappropriate surface preparation, If Not Corrected/Repaired in timely manner at Vendor Shop.

Project Detail

Project: Deep River Unit 03

 Equipments: Pumps

Date: June 2018 to May 2019

Vendor Location: Fabricator of Pumps in Nuevo Leon, Mexico.

Item #1

Final Visual Inspection per Inspection Plan ITP 216-RU-1023A/B Rev 2.

Items Inspected: Pump Tag DR-1023-A/B, Serial Number 452612-1/2, Nozzle Header.

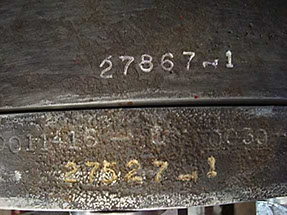
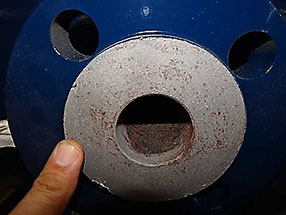
Findings: Suction/Vent Nozzles-Flanges Item 3 on both Pumps, Observed with flange facing finish(Roughness) seriously damaged, apparently the gasket seats finish was exposed to the action of Blasting during Surface Preparation with No Protection.

Re-Inspection: A NCR-1023-01 has been open on this Issue and per Customer Disposition, Flanges damaged have been cutted off and new flanges have been installed and welded. As well a new Hydrostatic Test has been conducted for the Reworked Nozzle Header as per reviewed records as provided from Vendor. See Photos on Referenced Issue.

Benefits to Our Customer: By using Fraza Inspection Team, Customer saved a lot of of time and money preventing excessive expenses per back charges for Re-works at field site per unacceptable issues on Damaged Gasket Seating on Nozzle flanges for Field Connections, If Not Corrected/Repaired in timely manner at Vendor Shop.

v

CALL US NOW


Office: +52 81 2185 7616

Mobile: +52 81 8366 3611

#

COME VISIT US


14 de Abril 141, Colonia 21 de Enero, CP 67160, Guadalupe N.L., México

3

SEND US MESSAGE


E-Mail: contact@frazainspection.com


"Unwavering Passion and Enthusiasm for the Service since 1987"

c

f

i

© 2019 Fraza Inspection Company  - All Rights Reserved

  • Project #1

    Project Detail

    Project: Beauty High Mountain Unit 03

    Equipment: Pumps

    Date: September 2018 - May 2019

    Vendor Location: Fabricator of Pumps in Estado de Mexico, Mexico.

    • Item #1

      Review on Paint Systems per Vendor ITP 790033-010 Rev 2, Item 2.1 and Approved Painting Procedure BHM-040-R-050A Rev C.

      Item Inspected: Pump Tag BHM-60-T-0310-A/B/C.

      Findings: Specified Paint Systems per Approved Painting Procedure BHM-040-R-050A Rev C are as follows: Casing and Cover, Paint System BHCS-22C- Surface preparation: Clean to SSPC-SP1-Primer: International Paints Intertherm 751 CSA(25-65 microns). Bearing Housing, Paint System BHCS-4A, Surface preparation to Sa3, Primer, Hempel Paints Hempadur 85671 or International Paints Inter Line 399(95-125 microns). Due to a lack of communication between Main Vendor and Manufacturer in Mexico, Wrongly, a Paint System per Paint Specification BQS-760033-0010 Rev 0, with Primer, International Interzinc 22(50-80 microns) has been applied by Mexican Manufacturer on Casing, Cover and Bearing Housing.

      Re-Inspection: Per Customer Disposition, Casing, Cover and Bearing Housing have been Re-Blasted and Re-Painted in accordance with Paint Systems per Approved Painting Procedure BHM-040-R-050A Rev C referenced Above. See Photos before and After Re-work on Paint.

    • Item #2

      Visual Inspection  per Vendor ITP 790033-020 Rev 2, Items 1.1, 1.4, 1.5, Data Sheet BHM-700033-020 Rev C and Standard MSS-SP-55.

      Item Inspected: Pump Tag  BHM-70-R-0209-C/D, Volute Case Part Number 30.101- Traceability Code T58695 Heat Number 8153144.

      Findings: Two areas on casting surfaces of Volute Casing observed with surface irregularities exceeding the example “a” and ”b” of defects Type Gas Porosity and Sand Inclusions from Standard MSS-SP-55, Not acceptable to Project Requirements referenced Above.

      Re-Inspection: All referenced surface irregularities have been repaired by Vendor to bring them within project specifications. See Photo on Referenced Issue.

    • Item #3

      Visual Inspection on Surface Preparation per Vendor ITP 790033-030 Rev 2, Item 3.6 and Approved Painting Procedure BHM-040-R-050A Rev C.

      Item Inspected: Pump Tag BHM-80-T-0620-A/B/C.

      Findings: Per Section 7.8.2 from Approved Painting Procedure referenced above, Prior to blasting, rough welds and sharp edges shall be ground to a minimum radius of 3 mm to ensure proper coating application. However after Primer Coating Application, several áreas from casting and machined surfaces still were observed with Sharp edges Not ground to a minimum radius of 3 mm as specified.

      Re-Inspection: Corrections to get Rough Welds and Sharp edges ground to a minimum radius of 3 mm, Completed by Vendor. See Photos as illustration on referenced Issue before and after Corrections.

      Benefits to Our Customer: By using Fraza Inspection Team, Customer saved a lot of of time and money preventing excessive expenses per back charges for Re-works at field site per unacceptable issues on Surface Preparation, Painting and Not Compliance to Project Specifications, If Not Corrected/Repaired in timely manner at Vendor Shop.

  • Project #2

    Project Detail

    Project: Bankok West Project Unit 02

    Equipments: Reflux Pumps

    Date: July 2009 - March 2010

    Vendor Location: Pumps Fabricator in Estado de Mexico, Mexico.

    • Item #1

      Visual Inspection per ITP-11623-0030 Rev 2, Item 2.2, GA Drawings GA-6230030-01 Rev B and Vendor Paint Specification QPS-1623-0030 Rev 1.

      Item Inspected: Pump Tag GHP 47B-

      Findings: ¾¨ Nozzle-Connection on Plans was found gusseted only in one location no in accordance with applicable Fabrication Drawing which specifies for gusseting in two locations. Vendor has repaired on Pump GHP-47B to place and weld a 2nd gusseting on referenced Nozzle as specified. Fraza Team has informed to Vendor Attendee that in accordance with API-610 Standard Section 5.4.3.5 if a repair by welding is done after Hydrotest, then an additional Hydrotest is required. Customer has confirmed a Re-Hydrotest must be conducted per Welding Done after original Hydrotest in accordance with API-610 Requirements referenced above.

      Re-Inspection: New Hydrotest conducted by vendor as per Customer Disposition. See photos below as illustration on referenced issue as originally found.

      Benefits to Our Customer: By using Fraza Inspection Team, Customer saved a lot of of time and money preventing excessive expenses per back charges for Reworks at field site per unacceptable issues on wrong gusseting of Connection Nozzles, If Not Repaired in timely manner at Vendor Shop.

  • Project #3

    Project Detail

    Project: Bankok West Project Unit 02

    Equipments: Reflux Pumps

    Date: July 2009 - March 2010

    Vendor Location: Pumps Fabricator in Estado de Mexico, Mexico.

    • Item #1

      Review on RT Examination per ITP-1852-0010 Rev 5, Item 6.2, GA Drawings GA-8520010-01 Rev B and Customer Specification NT-20-05-03 Table 3.

      Item Inspected: Pumps Tag NTP 59A/B, Casings-31898-1/2

      Findings: RT Examination Reports does not reflect on RT Exposures for Critical Areas Number 3, 4 and 5 as required to be RT Examined per Sketch of Vendor ITP Rev 5 and Customer Spec NT-20-05-03 Table 3. Vendor has confirmed unfortunately for some reason RT Examination on referenced Critical Areas has been omitted.

      Re-Inspection: A NCR has been issued on this critical issue. By Customer disposition on NCR the referenced pumps have been disassembled to complete the RT Examination on referenced Critical Areas as per Project Requirements. Addressed by vendor in accordance with Customer Disposition.

      Benefits to Our Customers: By using Fraza Inspection Team, Customer saved a lot of of time and money preventing excessive expenses per back charges for Extra-RT Examination and Reworks at field site per unacceptable issues on Omitted RT Examination, If Not Corrected/Repaired in timely manner at Vendor Shop.

  • Project #4

    Project Detail

    Project: Blue Lake Refinery

    Equipments: Pumps

    Date: February 2011 - December 2011

    Vendor Location: Fabricator of Pumps in Estado de Mexico, Mexico.

    • Item #1

      Final Inspection per ITP-14743-0010 Rev 3 Item 16.2, Drawing GA-14743-0020 Rev B and Customer Specification-SERJ-I-003 Rev 2.

      Item Inspected: Pump Tag 019-R-0034C.

      Findings: Plan 53B, Acumulator CD-04001703009, observed with No ASME Stamp Nameplate to support fabrication under ASME Code Requirements, as specified on GA Drawing referenced above.

      Re-Inspection: The referenced Acumulator Vessel has been fabricated again under ASME Code Requirements as reflected on installed ASME Nameplate. See Photos on Installed Nameplate reflecting on ASME Code Stamp.

    • Item #2

      Visual Inspection per ITP-14743-010 Rev 3 Item 2.2 and Drawing GA-14743-010 Rev B.

      Item Inspected: Pump Tag 013-R-0026A/Tag 014-R-0027B/Tag 015-R-00028A/Tag 016-R-0029B-GA.

      Findings: Beam Support of Plan 21-Cooler observed with gusset welds Not properly tied into adjacent welds and with pieces of unconsumed filler metal.

      Re-Inspection: Repairs completed by Vendor. See photo as illustration.

    • Item #3

      Visual Inspection on Paint per ITP-14743-0010 Rev 3 Item 12.2, Drawing GA-14743-0030 Rev B, Vendor Paint Specifications RMS20014743-0010-01 Rev 5 and Customer Specification-SERJ-I-003 Rev 2.

      Item Inspected: Pumps Tag 017-R-0029C/Tag 018-R-0030B.

      Findings: Plan 21-Cooler Vessel observed with 6¨-WNRF and Blind Flanges with no surface preparation per specified cleaning  ISO-Sa-2.5 (SSPC SP10) since the applied painting is showing lack of adherence, getting off, leaving discovered the substrate no surface prepared.

      Re-Inspection: Vendor has completed on repairs by re-blasting and painting on such areas in accordance with requirements per Project Documents referenced above. Addressed by Vendor. See photos as illustration.

    • Item #4

      Visual and DFT Inspection on Paint per ITP-14743-0010 Rev 3 Item 12.2, Drawing GA-14743-0020 Rev B and Customer Specification-SERJ-I-003 Rev 2.

      Item Inspected: Pumps Tag 018-R-0031C/Tag 018-R-0032B.

      Findings: Carbon Steel Pump Parts and Top Surface of Base Plate. Specified Total DFT Range per Vendor Paint Spec above: 8.0 to 12.0 Mils: Actual DFT Measurements: 11.5, 13.8, 14.5, 16.3 and 15.7 Mils Total Average-14.3 mils. Out of Tolerance to Customer Specification-SERJ-I-003 Rev 2 and SSPC-PA-2 Standard.

      Re-Inspection: Vendor has completed on repair to bring final DFT within tolerances per Project Specifications. See Photos on referenced Issue.

      Benefits to Our Customer: By using Fraza Inspection Team, Customer saved a lot of of time and money preventing excessive expenses per back charges for Re-works at field site per unacceptable issues on welding, surface preparation, painting and Not Compliance to ASME Stamping Requirements, If Not Corrected/Repaired in timely manner at Vendor Shop.

  • Project #5

    Project Detail

    Project: Bankok East Project

    Equipment:  Reflux Pumps

    Date: July 2009 to March 2010

    Vendor Location: Pumps Fabricator in Estado de Mexico, Mexico.

    • Item #1

      Visual Inspection on Surface Preparation per ITP-11416-0040 Rev 6, Item 2.8, GA Drawing GASY-114160040-01 Rev D and Customer Paint Specification QPS-11416-0010/40 Rev 0.

      Item Inspected: Pump Tag RNP 35A Case and Cover Assembled together.

      Findings: Cover found installed/bolted to Case, as per vendor this done to protect the internal machined surfaces of the Pump Case from the Blasting action: The exposed CS Surfaces between the interface of Case and Cover will not receive the required blasting preparation and painting spray since the gap between both parts is extremely closed, therefore the blast media as well the paint spray will not reach properly these areas to ensure a complete blast and paint Coverage.

      Re-Inspection: Attending the observation from Fraza Team, Vendor has finally addressed to make sure a full coverage from blasting and painting on referenced áreas has been achieved. See photo below.

      Benefits to Our Customers: By using Fraza Inspection Team, Customer saved a lot of of time and money preventing excessive expenses per back charges for Reworks at Field Site per unacceptable issues on surface preparation and painting, If Not Corrected/Repaired in timely manner at Vendor Shop.

  • Project #6

    Project Detail

    Project: High Land Unit 03

    Equipments: Pumps

    Date: December 2016 - September 2017

    Vendor Location: : Fabricator of Pumps in Nuevo Leon, Mexico.

    • Item #1

      Verification and Visual Inspection on Bolting Grades per ITP-3856-A/R  Rev C Item 15.

      Items inspected: Pump Tag P-3856 A/R.

      Findings: All Bolts installed on interfaces of column pipes, Motor support and Case Cover found in SS and CS Grades not in compliance with Cross Sectional Drawings.

      Re-Inspection: All Wrong Bolts/Nuts have been removed and Specified Bolts ASTM A-193 B7 and Nuts ASTM A-194-2H have been Installed in accordance with Cross Sectional Drawings and Material Requisition 28569-HL-134156-02 Rev 0 Section 4.3. See Photos on right bolts/nuts as installed.

    • Item #2

      Visual Inspection per ITP P-3845-A/R-196543-HL-0030 Rev 3 Item 3, Welding Specification WS-U-005 Rev 2 and Cross Sectional Drawing 833430088 Rev C.

      Item inspected: Pump Tag 3845 A/R, Part Number 54010291, Column Pipe.

      Findings: Buttweld of Reducer 4"-6" to Elbow 4"-Inside, observed with No Complete Joint Penetration(Underfill) and Excessive Undercuts. Not Acceptable to Customer Welding Specification WS-U-005 Rev 2 Section Number 5.0, which specifies "All buttwelds shall be full penetration and Root Pass shall be deposited by GTAW Process".

      Re-inspection-repairs completed by vendor in compliance to Project requirements referenced above. See Photo on referenced issue

    • Item #3

      Visual Inspection per ITP-P3845-A/R-196543-HL-0030 Rev 3 Item 3 and Detail Drawing 80971104-03 Rev 0.

      Items Inspected: Pump Tag 3848 A/R, Part Number, 5410250-07, Column Pipe.

      Findings: Joints Flange to Pipe, specified CJP plus Fillet Weld Size ½”, Actual as measured, Undersized fillet weld 1/4” to 5/16”. Also Extra Undersizing per Over-Machining done on referenced  Fillet Weld.

      Re-inspection-repairs completed by vendor in compliance to Project requirements. See Photo on referenced Issue.

    • Item #4

      Visual and DFT Inspection on Painting per ITP-P3845-A/R-HL-0030 Rev 3 Item 12, Cross Sectional Drawing 8734340023 Rev 03 and Painting Spec HL-T-588-01 Rev 2.

      Items Inspected: Pump Tag 3850-A.

      Findings-A spot Inside Header near Top Flange showing burn-through(Damaging on Base Metal), probably produced during Fabrication.

      Re-inspection-repairs completed by vendor in compliance to Project requirements. See Photo on described issue.

    • Item #5

      Review of Documentation per ITP P-3852-A/R, Rev B Item 14.

      Item Inspected: Pump Tag P-3852-A/R, Specified PT Examination on Impeller and Shaft per Data Sheet 198591-230132-01-DS-0080 Rev 2.

      Findings-PT Examination for Shaft had originally been omitted by Vendor.

      Re-Inspection: Referenced PT Examination on Shafts has been conducted on all Pumps as confirmed on Reports provided for Review. Details reviewed on PT Examination Reports, Acceptance Criteria, Reflected as G3-4, ASME VIII Div 1 Appendix 8, Extent of Examination, all accessible areas, Test Results, aceptable, everything satisfactory to Project Requirements.

    • Item #6

      Documentation Review per ITP P-3854-A/R  Rev C Item 16.

      Items Inspected: Pump Tag P-3854-A/R. MT Examination specified for Castings and Discharge Pipe accessible welds per Data Sheet 198591-230132-DS-0070 Rev 2, Note 16.

      Findings: MT Examination for accessible welds of Discharge pipe had originally been omitted by Vendor.

      Re-Inspection: Referenced MT Examination on Discharge pipe accessible welds has been conducted on Pumps as confirmed on Report provided for Review. Details reviewed on MT Examination Reports, Acceptance Criteria, Reflected as G3-2, ASME VIII Div  1 Appendix 6, Extent of Examination, all accesible welds, Test Results, Acceptable, everything acceptable to Project Requirements.

      Benefits to Our Customer: By using Fraza Inspection Team, Customer saved a lot of of time and money preventing excessive expenses per back charges for Re-works at field site per unacceptable issues on Wrong Materials, Omitted NDT Examinations and Welding, If Not Corrected/Repaired in timely manner at Vendor Shop

  • Project #7

    Project Detail

    Project: High Land Unit 02

     Equipments: Pumps

    Date: July 2014 to October 2014

    Vendor Location: Fabricator of Pumps in Nuevo Leon, Mexico.

    • Item #1

      Verification and Visual Inspection on Bolting Grades per ITP P-4358-A/R  Rev C Item 15 and Cross Sectional Drawing 567-AR-077-01 Rev C.

      Items inspected: Pump Tag P-4358 A/R.

      Findings: Galvanized Pressure Containing Bolts observed installed on interfaces of Casing to Cover, Not Satisfactory to Referenced Cross Sectional Drawing.

      Re-Inspection-Vendor has removed all wrong Galvanized Pressure containing Bolts and other ones in Stainless Steel Material as specified have been installed. See Photo of Galvanized Bolts originally Installed.

    • Item #2

      Visual Inspection per ITP P-4360-A/R  Rev C Item 16.

      Item Inspected: Pump Tag 4360A/R Base Plates.

      Findings: Base Plate of both Pumps observed with Critical Damagings on Base Metal and evidences from a Major Repair done by welding/grinding without previous approval from Customer, Not Acceptable to Material Requisition 28569-HL-134156-02 Rev 0 Section 7.4 and PO Project Requirements.

      Re-Inspection: Per Customer Disposition, the referenced Base Plates have been scrapped and other new ones have been fabricated in accordance with Project Requirements. See potos on described Issues.

      Benefits to Our Customer: By using Fraza Inspection Team, Customer saved a lot of of time and money preventing excessive expenses per back charges for Re-works at field site per unacceptable issues on Wrong Materials and Not Proper Fabrication, If Not Corrected/Repaired in timely manner at Vendor Shop.

  • Project #8

    Project Detail

    Project: Beauty Valley Unit 01

    Equipments: Vertical Pumps

    Date: March 2015 to April 2015

    Vendor Location: Fabricator of Pumps in Nuevo Leon, Mexico.

    • Item #1

      Witness on Adhesion Test on Completed Paint System Item A5M.06 per Customer Paint Specification BV5481 Rev D, Vendor Paint Procedure BV-934-01 Rev 01 and Standard ISO 12944-5:2007(E)-Corrosivity Category C5M.

      Items Inspected: Columns and Motor Support.

      Findings: Adhesion Test Results: Items with test spots showing Peeling(Flaking), Item 223702527 Middle Column, Item 223702530 Upper Column and Item 223702533 Motor Support, Not Acceptable to Section 7.3.2.7 of Vendor Procedure BV-934-01 Rev 01. Failed Results reflect a poor condition of adhesion of the paint film on tested areas, which can be caused by an irregular and inappropriate surface preparation or an irregular anchorage profile.

      Re-Inspection: Fraza team has recommended to Customer to blast mínimum to SSPC SP 6 Commercial Cleaning all ítems with rejected adhesión test in order to achieve a suitable and reliable condition of adhesion. Subsequently addressed by Customer. See Photos on Adhesion Test Spots.

      Benefits to Our Customer: By using Fraza Inspection Team, Customer saved a lot of of time and money preventing excessive expenses per back charges for Re-works at field site per unacceptable issues on an irregular and inappropriate surface preparation, If Not Corrected/Repaired in timely manner at Vendor Shop.

  • Project #9

    Project Detail

    Project: Beauty Valley Unit 01

    Equipments: Vertical Pumps

    Date: March 2015 to April 2015

    Vendor Location: Fabricator of Pumps in Nuevo Leon, Mexico.

    • Item #1

      Final Visual Inspection per Inspection Plan ITP 216-RU-1023A/B Rev 2.

      Items Inspected: Pump Tag DR-1023-A/B, Serial Number 452612-1/2, Nozzle Header.

      Findings: Suction/Vent Nozzles-Flanges Item 3 on both Pumps, Observed with flange facing finish(Roughness) seriously damaged, apparently the gasket seats finish was exposed to the action of Blasting during Surface Preparation with No Protection.

      Re-Inspection: A NCR-1023-01 has been open on this Issue and per Customer Disposition, Flanges damaged have been cutted off and new flanges have been installed and welded. As well a new Hydrostatic Test has been conducted for the Reworked Nozzle Header as per reviewed records as provided from Vendor. See Photos on Referenced Issue.

      Benefits to Our Customer: By using Fraza Inspection Team, Customer saved a lot of of time and money preventing excessive expenses per back charges for Re-works at field site per unacceptable issues on Damaged Gasket Seating on Nozzle flanges for Field Connections, If Not Corrected/Repaired in timely manner at Vendor Shop.