Project Detail
Project: 529618-High Coast-3
Equipments: Module Piping Spools
Date: November 2019 to April 2020
Vendor Location: Fabricator of Piping Spools in Tamaulipas, Mexico.
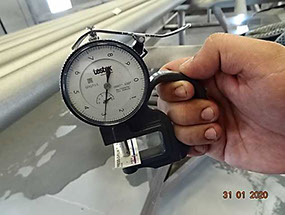
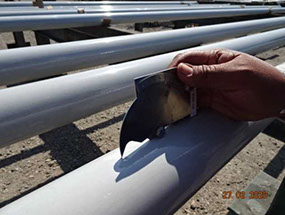
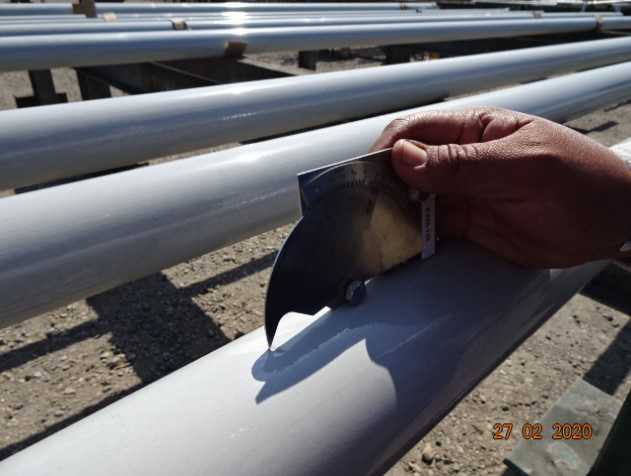
Witness on Measurement of Anchorage Profile per ITP 529618-HC-01 Rev 1, Item No. 5.2 and Approved Vendor Paint Procedure HC-PC-02 Rev 2, Paint System Nr 1.
Inspected Item: Lot of Spools identified as Control Number H0043-02, H0053-01 and H0073-01.
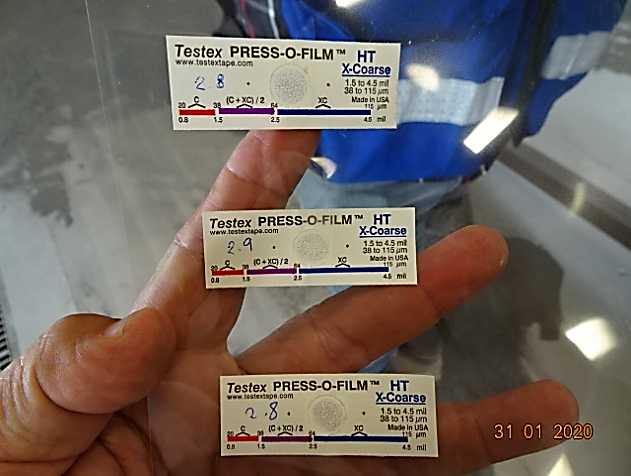
Findings: Specified Range for Anchorage Profile, 2.0-2.5 mils, Actual as Measured, 2.8, 2.9 and 2.8 Mils. Exceeded above the max specified. Vendor Team was warned on the risk of leaving peaks unpainted due to exceeded anchorage profile, producing rusting, therefore They were aware to adjust their blasting parameters such as the distance between the blast nozzle to the item being blasted, air pressure etc in order to bring the blasting profile to within specification.
Re-Inspection: Based on the values measured during last witnesses on surface preparation as well as the anchor profile records per documentation review on spools inspected in the last visits by Fraza Team, Vendor has kept the anchoring profile under control and within the specified ranges. See photos as Illustration on referenced issue as originally found.

Visual/Dimensional Inspection per ITP 529618-HC-01 Rev 1 Items No. 3.3/3.4.
Item Inspected: Spool 714-TU07-MT-95781-01-1, Control Number H007-01.
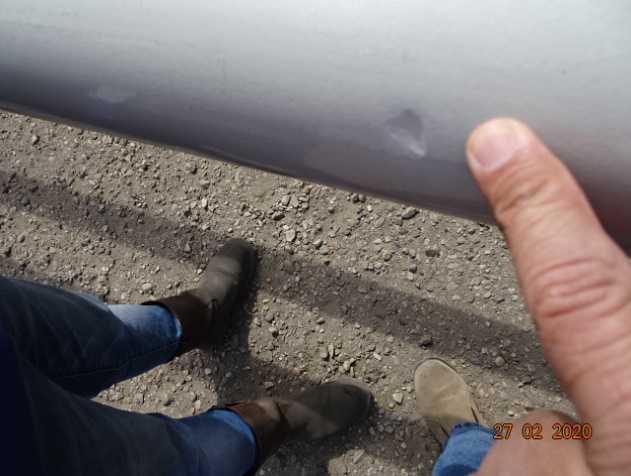
Findings: Spool fabricated from SS Pipe SA 312-Tp 316/316L, 3” Sch STD (0.216” Wall Thickness). A surface imperfection on base metal with a depth exceeding 3/64"(0.04687”) probably caused by a blow during the manufacturing process. The depth of this surface imperfection is Not Acceptable to Section 9.1 and Table 3 from Material Spec SA 312. Vendor Team addressing on this Issue.
Re-Inspection: Vendor has decided to reject and segregate definitively the referenced spool. See photos as Illustration on referenced issue as originally found.
Review on RT Examination Records and Films per ITP 529618-HC-01 Rev 1 No. 4.6.
Item Inspected: Spool 716-TU07-PT-95782-01-2, Control Number H0230-02.
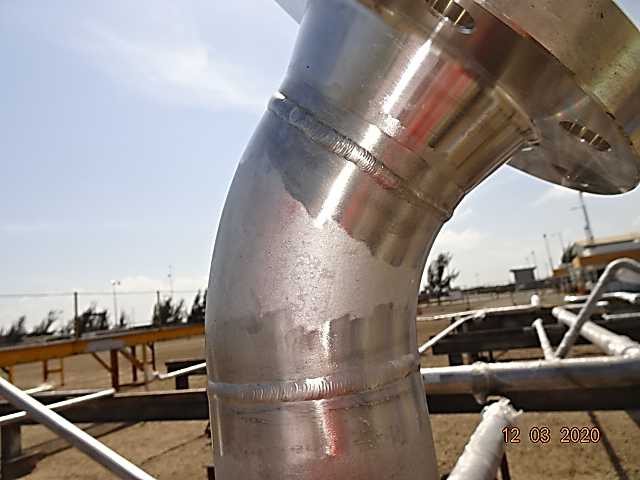
Findings: A Girth Weld Identified as J1, Joining WNRF Flange Item TR-533 to 45 deg Elbow Item TS-421, 100% RT Examined per Report Nr RT-023 dated Feb 14, 2020. Not Acceptable to Technical Specification 529618-HC-TS-01 Rev 0, Table 2, Examination Class T, Note 3, which specifies for random examinations, the welds to be RT examined must not include welds to flanges, as done.
Re-Inspection: Per observation from Fraza Team, the referenced RT Examined Girth Weld has been discarded and other one within the same spool not connecting to flanges has been RT Examined with Satisfactory Results. See photo as Illustration on referenced joint wrongly RT Examined.
Review of Surface Preparation and Painting Reports per ITP 529618-HC-01 Rev 1 Item No. 5.0 and Approved Vendor Paint Procedure HC-PC-02 Rev 2, Paint System Nr 1.
Item Inspected: Spool 716-TV06-RU-78652-01-3, Control Number H0450-01.
Findings: Drying/Curing Time between Primer Coating Completion and Intermediate Coating Start: Minimum required 24 Hours at 20 C deg (22 Hours at 23.5 C deg), Actual per Vendor QC Report, 14 Hours at 23.5 C deg, Not In Accordance with Primer Coating Dimetcote 9 Manufacturer Datasheet and the requirements of Drying/Curing Time between layers per Document Customer Inspection Requirements 529618-HC-IR-037 Rev 1 Item 23.
Re-Inspection: Vendor has decided to reject the paint of Referenced Spool and surface prepare and paint again in accordance with Project Requirements.
Benefits to Our Customer: By using Fraza Inspection Team, Customer saved a lot of of time and money preventing excessive expenses per back charges for Re-works at field site per unacceptable issues on Surface Preparation, Painting and NDT, if Not Corrected/Repaired in timely manner at Vendor Shop.

© 2019 Fraza Inspection Company - All Rights Reserved
