Project Detail
Project: Singapore Refinery Unit 03
Equipments: CHRISTMAS TREES, POWER WATER INJECTION,
Date: December 2013 to February 2014
Vendor Location: Fabricator of Christmas Trees in Estado de Mexico, Mexico.
Visual Inspection on Assembly/Hydrostatic Test per Manufacturing Services Assurance & Integrity Plan CT-T13-001 Rev 2 Item 11.
Items Inspected: Christmas Tree Serial Number CH-T-14-0039.
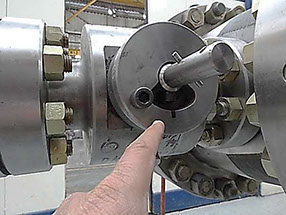
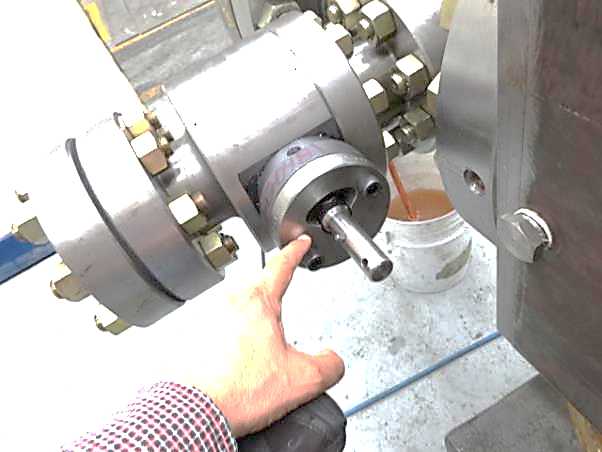
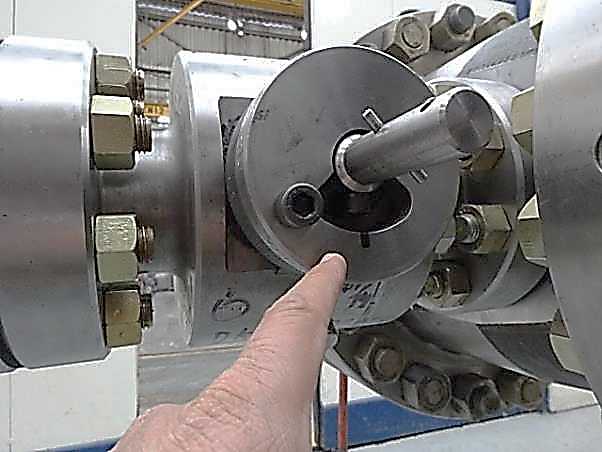
Findings: During witness of Hydrostatic Test, on 2 1/16” Sub Assy Valve Serial Number CH-13-0356 was observed an adapter flange assembled in opposite orientation to the specified position per Vendor Assembly Drawing. Vendor Production Team has decided disassemble and modify the orientation of the Referenced Adapter Flange in accordance with Assembly Drawings. Fraza Team has requested to Vendor to conduct again all required functional and hydrostatic tests on referenced 2 1/16” Sub Assy Valve in order to ensure the disassembly and re-assembly of referenced adapter flange has not affected its integrity and tightness.
Re-Inspection: Vendor has conducted again on functional and hydrostatic tests on 2 1/16” Sub Assy Valve in accordance with original project requirements. See Photos as illustration on described Issue.
Visual Inspection on Assembly and Drift Test per Manufacturing Services Assurance & Integrity Plan CT-T13-001 Rev 2 Item 11.
Items Inspected: Block Assy, Serial Number CH-13-0398.
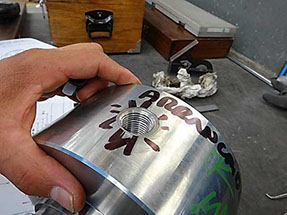
Findings: During Traceability/Set Out Inspection, Ball identified as OC2M3402-74, Heat Number 414156, had been originally assigned to be assembled in referenced Block Assy, however, such ball did not pass the individual drift test before assembly by having its internal diameter closed and out of tolerance, therefore it was replaced by other Ball with markings OC2M3402-87 HN-414156 with accepted drift test.
Re-Inspection: Fraza Team has requested Vendor QC to document, identify and segregate the rejected Ball in order to avoid It is used in any other Christmas Tree for Our Customer. See Photo on the referenced quality problem.
Visual Inspection on Assembly/Hydrostatic Test per Manufacturing Services Assurance & Integrity Plan CT-T13-001 Rev 2 Item 11.
Items Inspected: Christmas Tree Serial Number CH-T-13-0359.
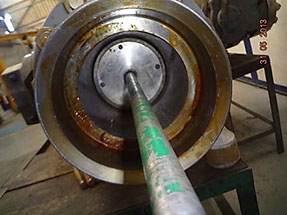
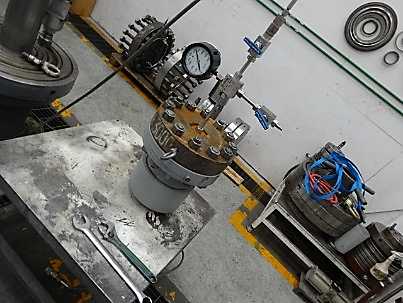
Findings: Fabricator personnel has disassembled unduly the Tree Cap, breaking the original seal between its parts. As confirmed from Fabricator this was done to eliminate the presence of oxidation within the assembled Tree Cap. Fraza Team has requested to Fabricator to create awareness in their Assembly Staff to avoid such errors since all referenced tree caps had already been hydrostatically tested by the supplier at a specified pressure of 6000 psi as documented and certified on reviewed evidences, therefore such tree caps must not be disassembled for any reason at Fabricator Facilities.
Re-Inspection: Fraza Team has requested to Fabricator to document this Critical Issue through an internal NCR in order to prevent its recurrence. NCR CHT783479 Rev 0 was issued on this issue. Per disposition from Fabricator Engineering Team the Tree Cap has been re-assembled in accordance with assembly drawing and tested hydrostatically again at a pressure of 6000 psi, before assembly of the Tree Cap in the Christmas Tree. See photo as illustration of hydrostatic test of re-assembled tree cap.
Benefits to Our Customer: By using Fraza Inspection Team, Customer saved a lot of of time and money preventing excessive expenses per back charges for Re-works at field site per unacceptable issues on Dimensions, Not Proper Assembly Process and Not Compliance to Project Requirements, if Not Corrected/Repaired in timely manner at Vendor Shop.
Project Detail
Project: Singapore Refinery Unit 01
Equipments: Christmas Trees
Date: April 2011 to to March 2012
Vendor Location: Fabricator of Christmas Trees in Estado de Mexico, Mexico.
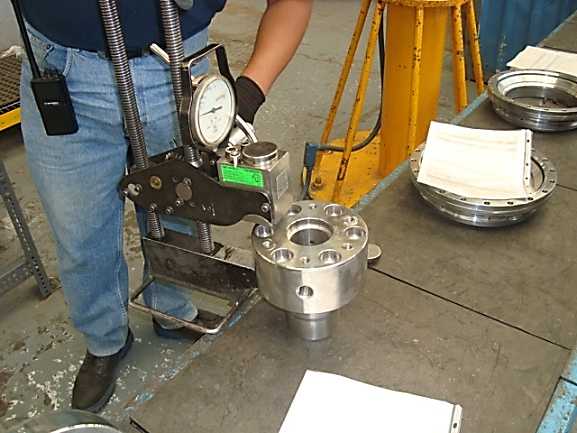
Witness on Hardness Test per Manufacturing Services Assurance & Integrity Plan CT-T13-001 Rev 2 Item 4, Machining Drawing: 58702-F Rev A, Vendor Spec CT-S9.6.1 Rev 10 and API-6A Specification.
Item Inspected: Upper Trunnion P/N 58702T.
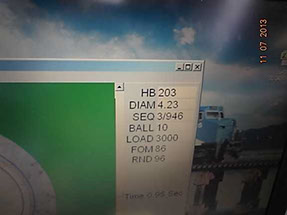
Findings: Specified Hardness Range 207 to 235 Brinell per vendor material specification-CT-S9.6.1 Rev 10. Actual Hardness Measurements: 190 to 203 Brinell, Not Acceptable to Referenced Vendor Material Specification.
Re-Inspection: Per Customer Direction, Vendor has taken actions to get new raw material with acceptable hardness and referenced parts have been fabricated again. See Photos as Illustration on referenced Issue.
Visual and DFT Inspection on Paint per Manufacturing Services Assurance & Integrity Plan CT-T13-001 Rev 2 Item 16 and Customer Painting Specification-STG-094-CHT-2006 Rev 1.
Item Inspected: Christmas Tree Serial Number CH-T-13-0489, 100% Top Coated.
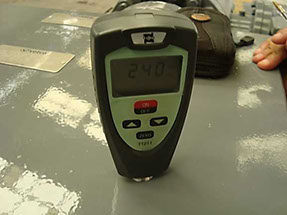
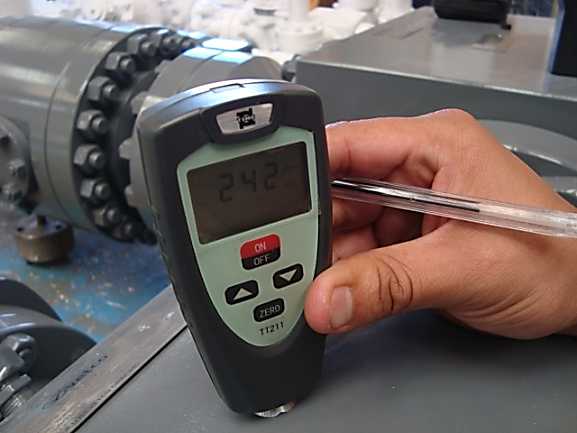
Findings: Specified DFT Total Range: 320 to 420 Microns, Actual DFT Measurements per Spot Check: 186, 264, 257, 240 and 242 Microns, General Average: 237.8 Microns. Out of Specified DFT Range.
Re-Inspection: After re-application of painting, DFT Measurements: 397, 325, 330, 325 and 370 Acceptable per Referenced Painting Specification. See Photos on described Issue.
Benefits to Our Customer: By using Fraza Inspection Team, Customer saved a lot of of time and money preventing excessive expenses per back charges for Re-works at field site per unacceptable issues on Painting and Not Acceptable Hardness if Not Corrected/Repaired in timely manner at Vendor Shop.
Project Detail
Project: Singapore Refinery Unit 02
Equipments: CHRISTMAS TREES, POWER WATER INJECTION,
Date: April 2013 to November 2013
Vendor Location: Fabricator of Christmas Trees in Estado de Mexico, Mexico.
Visual Inspection per Manufacturing Services Assurance & Integrity Plan CT-T13-001 Rev 2 Item 5 and Drawing 65543-F Rev C.
Item Inspected P/N 65543T, Upper Trunnion, marked as CH403144372-5(HT Number-609761).
Findings: Specified Thread 1/2¨-NPT, observed with several threads with critical damagings by tear of material.
Re-Inspection: Item Rejected by Vendor QC Team, as well a new part has been fabricated. See Photo as illustration on described Issue.
Witness on Drift Test per Manufacturing Services Assurance & Integrity Plan CT-T13-001 Rev 2 Item 9.
Item Inspected: Entire Christmas Tree Serial Number CH-T-13-0490. Aplicable Documents: Spec WGT6.4.32 and API 6A 20th Ed. PSL2.
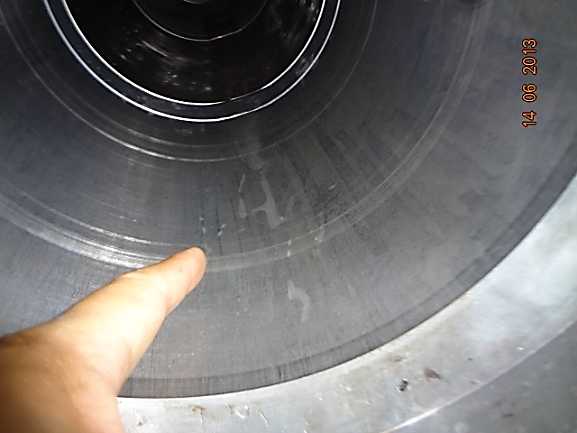
Findings: Test Results, Failed, drift gage did not pass through the Tree due to End Header DG450139983-01 showed closed inner diameter (8.988”) out of tolerance per applicable Drawing. Such Deviation had already been detected and reported previously by Fraza Team to Vendor QC, however wrongly it was accepted by Vendor Engineering Team. The Block Assembly serial number CH-0195(Including the defective End Header) had to be removed from Christmas Tree and other block was assembled in order to conduct again the Final Drift and Hydrostatic Tests.
Re-Inspection: Coming back to defective End Header referenced above, as confirmed by Vendor QC Team, it has been corrected to bring the Inner Diameter within Specified tolerances, as well Drift test conducted again and witnessed by Fraza Team with Satisfactory Results. See Photos as illustration on described Issue.
Dimensional Inspection per Manufacturing Services Assurance & Integrity Plan CT-T13-001 Rev 2 Item 5 and Drawing 78773-F Rev E.
Item Inspected: Valve Center Parts, P/N 78773T identified as CH23065-05/08/04. Documents to follow, Vendor Dimensional Instructive HYI-54 Rev 1.0 and API-6A Section 7.4.2.1.4.
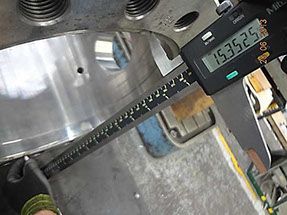
Findings: Specified Dimension-15.360” to 15.365¨, Actual dimensions as Measured-15.331”, 15.333” 15.346”, 15.352” and 15.353”, All of them out of Tolerance per Referenced Drawing.
Re-Inspection: The parts have been Re-Machined in order to bring the referenced dimension to within Specified Tolerances. See Photo as illustration on described Issue.
Witness on Hardness Test per Manufacturing Services Assurance & Integrity Plan CT-T13-001 Rev 2 Item 4, Machining Drawing 79603-F Rev B and Vendor Material Spec CT-R8.7.3 Rev.9.
Item Inspected: P/N 79603T, Block Body identified as CH30317654-06/11. Documents to follow, API-6A Spec Sections 7.4.2.2.3 and 7.4.2.1.3, Product Specification Level PSL2, ASTM-E-10 Table 2 and ASTM-E-140 Table 1.
Findings: Specified Hardness Range 207 to 237 Brinell, Actual Hardness Readings as measured, 197 to 198 Brinell, Not Acceptable per vendor material spec CT-R8.7.3 Rev.9.
Re-Inspection: By Vendor decisión, referenced items have been again thermically treated in accordance with project requirements in order to bring Hardness to within Allowable Range per project document mentioned above. See photo on described Issue.
Visual Inspection on Paint per Manufacturing Services Assurance & Integrity Plan CT-T13-001 Rev 2 Item 12 and Painting Specification-CHP-088-GT-207 Rev 0.
Items Inspected: Christmas Trees Serial Numbers CH-T-13-0295/296/297/298.
Findings: A lot of small circular valleys observed on painted surface with No exposure of the underlying coating nor substrate.
Re-Inspection: All surfaces observed with this paint defect have been repaired by sanding and re-top coating application with Acceptable Results. Looking for the root cause of referenced paint defects, Fraza Team has recommended vendor to conduct Compressed Air Blotter Tests in accordance with Standard ASTM D4285 to discard the presence of Oil and Moisture in the compressed air being used for blasting and painting. See Photo on described Issue.
Review on CMTRs for Raw Material per Manufacturing Services Assurance & Integrity Plan CT-T13-001 Rev 2 Item 3.
Item Inspected: Raw Material for P/N 74684T-Stem, Traceability Code TY15618874, HT Number Y8F3, Manufacturer NAS, Country of Origin USA. Document to follow API-6A-20th Edition-PSL-2.
Findings: Impact Tests, Specified Requirement: 20/14 Lb-Ft at minus 50F deg, Actual per CMTR, 41/37/60 Lb-Ft at minus 22 F Deg, a Temp Higher than the specified one, not in accordance with material specification WGS8.655.3.44 Rev 18 Section 7.5.2 from Vendor.
Re-inspection: Per Customer Direction, Referenced Raw Material has been rejected and segregated by Vendor and new raw material in Compliance with Project Requirements has been purchased.
Review on CMTRs for Raw Material per Manufacturing Services Assurance & Integrity Plan CT-T13-001 Rev 2 Item 3.
Item Inspected: Raw Material for P/N 74684T-Stem, Traceability Code, TY4288103, HT Number X7U4, Manufacturer NAS, Country of Origin USA. Document to follow, API-6A-20th Edition-PSL-2.
Findings: Hardness Test, Specified Requirement, 262 to 311 Brinell, Actual as Reported on CMTR, 220-225 Brinell, Not in accordance with Material Specification WGT8.655.3.44 Rev 18 Section 7.4.2 from Vendor.
Re-inspection: Per Customer Disposition, referenced Raw Material has been rejected and segregated by Vendor and new raw material in Compliance with Project requirements has been purchased.
Benefits to Our Customer: By using Fraza Inspection Team, Customer saved a lot of of time and money preventing excessive expenses per back charges for Re-works at field site per unacceptable issues on Painting, Wrong Materials, Not Acceptable Results on Functional Tests, Dimensions, Not Acceptable Hardness and No Proper Machining/Threading process, if Not Corrected/Repaired in timely manner at Vendor Shop.
© 2019 Fraza Inspection Company - All Rights Reserved
Project #1
Project Detail
Project: Singapore Refinery Unit 03
Equipments: CHRISTMAS TREES, POWER WATER INJECTION,
Date: December 2013 to February 2014
Vendor Location: Fabricator of Christmas Trees in Estado de Mexico, Mexico.
Item #1
Visual Inspection on Assembly/Hydrostatic Test per Manufacturing Services Assurance & Integrity Plan CT-T13-001 Rev 2 Item 11.
Items Inspected: Christmas Tree Serial Number CH-T-14-0039.
Findings: During witness of Hydrostatic Test, on 2 1/16” Sub Assy Valve Serial Number CH-13-0356 was observed an adapter flange assembled in opposite orientation to the specified position per Vendor Assembly Drawing. Vendor Production Team has decided disassemble and modify the orientation of the Referenced Adapter Flange in accordance with Assembly Drawings. Fraza Team has requested to Vendor to conduct again all required functional and hydrostatic tests on referenced 2 1/16” Sub Assy Valve in order to ensure the disassembly and re-assembly of referenced adapter flange has not affected its integrity and tightness.
Re-Inspection: Vendor has conducted again on functional and hydrostatic tests on 2 1/16” Sub Assy Valve in accordance with original project requirements. See Photos as illustration on described Issue.
Item #2
Visual Inspection on Assembly and Drift Test per Manufacturing Services Assurance & Integrity Plan CT-T13-001 Rev 2 Item 11.
Items Inspected: Block Assy, Serial Number CH-13-0398.
Findings: During Traceability/Set Out Inspection, Ball identified as OC2M3402-74, Heat Number 414156, had been originally assigned to be assembled in referenced Block Assy, however, such ball did not pass the individual drift test before assembly by having its internal diameter closed and out of tolerance, therefore it was replaced by other Ball with markings OC2M3402-87 HN-414156 with accepted drift test.
Re-Inspection: Fraza Team has requested Vendor QC to document, identify and segregate the rejected Ball in order to avoid It is used in any other Christmas Tree for Our Customer. See Photo on the referenced quality problem.
Item #3
Visual Inspection on Assembly/Hydrostatic Test per Manufacturing Services Assurance & Integrity Plan CT-T13-001 Rev 2 Item 11.
Items Inspected: Christmas Tree Serial Number CH-T-13-0359.
Findings: Fabricator personnel has disassembled unduly the Tree Cap, breaking the original seal between its parts. As confirmed from Fabricator this was done to eliminate the presence of oxidation within the assembled Tree Cap. Fraza Team has requested to Fabricator to create awareness in their Assembly Staff to avoid such errors since all referenced tree caps had already been hydrostatically tested by the supplier at a specified pressure of 6000 psi as documented and certified on reviewed evidences, therefore such tree caps must not be disassembled for any reason at Fabricator Facilities.
Re-Inspection: Fraza Team has requested to Fabricator to document this Critical Issue through an internal NCR in order to prevent its recurrence. NCR CHT783479 Rev 0 was issued on this issue. Per disposition from Fabricator Engineering Team the Tree Cap has been re-assembled in accordance with assembly drawing and tested hydrostatically again at a pressure of 6000 psi, before assembly of the Tree Cap in the Christmas Tree. See photo as illustration of hydrostatic test of re-assembled tree cap.
Benefits to Our Customer: By using Fraza Inspection Team, Customer saved a lot of of time and money preventing excessive expenses per back charges for Re-works at field site per unacceptable issues on Dimensions, Not Proper Assembly Process and Not Compliance to Project Requirements, if Not Corrected/Repaired in timely manner at Vendor Shop.
Project #2
Project Detail
Project: Singapore Refinery Unit 01
Equipments: Christmas Trees
Date: April 2011 to to March 2012
Vendor Location: Fabricator of Christmas Trees in Estado de Mexico, Mexico.
Item #1
Witness on Hardness Test per Manufacturing Services Assurance & Integrity Plan CT-T13-001 Rev 2 Item 4, Machining Drawing: 58702-F Rev A, Vendor Spec CT-S9.6.1 Rev 10 and API-6A Specification.
Item Inspected: Upper Trunnion P/N 58702T.
Findings: Specified Hardness Range 207 to 235 Brinell per vendor material specification-CT-S9.6.1 Rev 10. Actual Hardness Measurements: 190 to 203 Brinell, Not Acceptable to Referenced Vendor Material Specification.
Re-Inspection: Per Customer Direction, Vendor has taken actions to get new raw material with acceptable hardness and referenced parts have been fabricated again. See Photos as Illustration on referenced Issue.
Item #2
Visual and DFT Inspection on Paint per Manufacturing Services Assurance & Integrity Plan CT-T13-001 Rev 2 Item 16 and Customer Painting Specification-STG-094-CHT-2006 Rev 1.
Item Inspected: Christmas Tree Serial Number CH-T-13-0489, 100% Top Coated.
Findings: Specified DFT Total Range: 320 to 420 Microns, Actual DFT Measurements per Spot Check: 186, 264, 257, 240 and 242 Microns, General Average: 237.8 Microns. Out of Specified DFT Range.
Re-Inspection: After re-application of painting, DFT Measurements: 397, 325, 330, 325 and 370 Acceptable per Referenced Painting Specification. See Photos on described Issue.
Benefits to Our Customer: By using Fraza Inspection Team, Customer saved a lot of of time and money preventing excessive expenses per back charges for Re-works at field site per unacceptable issues on Painting and Not Acceptable Hardness if Not Corrected/Repaired in timely manner at Vendor Shop.
Project #3
Project Detail
Project: Singapore Refinery Unit 02
Equipments: CHRISTMAS TREES, POWER WATER INJECTION,
Date: April 2013 to November 2013
Vendor Location: Fabricator of Christmas Trees in Estado de Mexico, Mexico.
Item #1
Visual Inspection per Manufacturing Services Assurance & Integrity Plan CT-T13-001 Rev 2 Item 5 and Drawing 65543-F Rev C.
Item Inspected P/N 65543T, Upper Trunnion, marked as CH403144372-5(HT Number-609761).
Findings: Specified Thread 1/2¨-NPT, observed with several threads with critical damagings by tear of material.
Re-Inspection: Item Rejected by Vendor QC Team, as well a new part has been fabricated. See Photo as illustration on described Issue.
Item #2
Witness on Drift Test per Manufacturing Services Assurance & Integrity Plan CT-T13-001 Rev 2 Item 9.
Item Inspected: Entire Christmas Tree Serial Number CH-T-13-0490. Aplicable Documents: Spec WGT6.4.32 and API 6A 20th Ed. PSL2.
Findings: Test Results, Failed, drift gage did not pass through the Tree due to End Header DG450139983-01 showed closed inner diameter (8.988”) out of tolerance per applicable Drawing. Such Deviation had already been detected and reported previously by Fraza Team to Vendor QC, however wrongly it was accepted by Vendor Engineering Team. The Block Assembly serial number CH-0195(Including the defective End Header) had to be removed from Christmas Tree and other block was assembled in order to conduct again the Final Drift and Hydrostatic Tests.
Re-Inspection: Coming back to defective End Header referenced above, as confirmed by Vendor QC Team, it has been corrected to bring the Inner Diameter within Specified tolerances, as well Drift test conducted again and witnessed by Fraza Team with Satisfactory Results. See Photos as illustration on described Issue.
Item #3
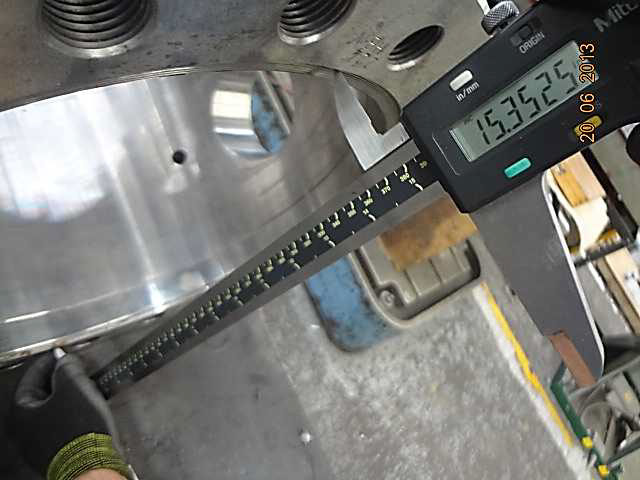
Dimensional Inspection per Manufacturing Services Assurance & Integrity Plan CT-T13-001 Rev 2 Item 5 and Drawing 78773-F Rev E.
Item Inspected: Valve Center Parts, P/N 78773T identified as CH23065-05/08/04. Documents to follow, Vendor Dimensional Instructive HYI-54 Rev 1.0 and API-6A Section 7.4.2.1.4.
Findings: Specified Dimension-15.360” to 15.365¨, Actual dimensions as Measured-15.331”, 15.333” 15.346”, 15.352” and 15.353”, All of them out of Tolerance per Referenced Drawing.
Re-Inspection: The parts have been Re-Machined in order to bring the referenced dimension to within Specified Tolerances. See Photo as illustration on described Issue.
Item #4
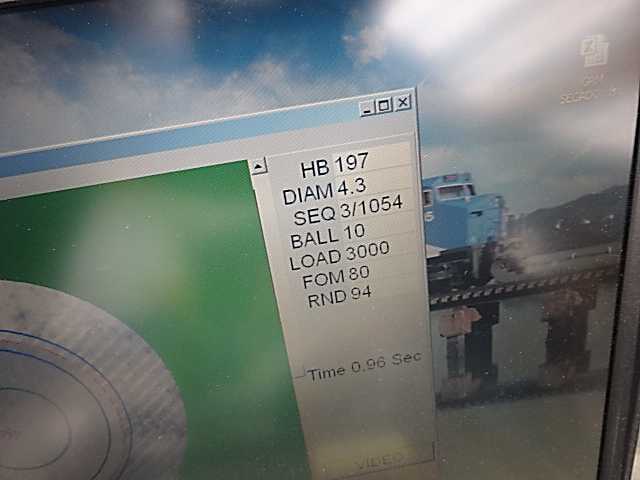
Witness on Hardness Test per Manufacturing Services Assurance & Integrity Plan CT-T13-001 Rev 2 Item 4, Machining Drawing 79603-F Rev B and Vendor Material Spec CT-R8.7.3 Rev.9.
Item Inspected: P/N 79603T, Block Body identified as CH30317654-06/11. Documents to follow, API-6A Spec Sections 7.4.2.2.3 and 7.4.2.1.3, Product Specification Level PSL2, ASTM-E-10 Table 2 and ASTM-E-140 Table 1.
Findings: Specified Hardness Range 207 to 237 Brinell, Actual Hardness Readings as measured, 197 to 198 Brinell, Not Acceptable per vendor material spec CT-R8.7.3 Rev.9.
Re-Inspection: By Vendor decisión, referenced items have been again thermically treated in accordance with project requirements in order to bring Hardness to within Allowable Range per project document mentioned above. See photo on described Issue.
Item #5
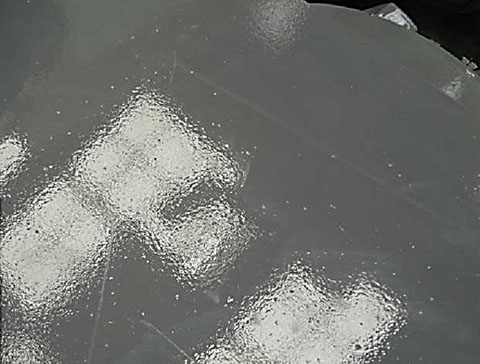
Visual Inspection on Paint per Manufacturing Services Assurance & Integrity Plan CT-T13-001 Rev 2 Item 12 and Painting Specification-CHP-088-GT-207 Rev 0.
Items Inspected: Christmas Trees Serial Numbers CH-T-13-0295/296/297/298.
Findings: A lot of small circular valleys observed on painted surface with No exposure of the underlying coating nor substrate.
Re-Inspection: All surfaces observed with this paint defect have been repaired by sanding and re-top coating application with Acceptable Results. Looking for the root cause of referenced paint defects, Fraza Team has recommended vendor to conduct Compressed Air Blotter Tests in accordance with Standard ASTM D4285 to discard the presence of Oil and Moisture in the compressed air being used for blasting and painting. See Photo on described Issue.
Item #6
Visual Inspection on Paint per Manufacturing Services Assurance & Integrity Plan CT-T13-001 Rev 2 Item 12 and Painting Specification-CHP-088-GT-207 Rev 0.
Items Inspected: Christmas Trees Serial Numbers CH-T-13-0295/296/297/298.
Findings: A lot of small circular valleys observed on painted surface with No exposure of the underlying coating nor substrate.
Re-Inspection: All surfaces observed with this paint defect have been repaired by sanding and re-top coating application with Acceptable Results. Looking for the root cause of referenced paint defects, Fraza Team has recommended vendor to conduct Compressed Air Blotter Tests in accordance with Standard ASTM D4285 to discard the presence of Oil and Moisture in the compressed air being used for blasting and painting. See Photo on described Issue.
Item #7
Review on CMTRs for Raw Material per Manufacturing Services Assurance & Integrity Plan CT-T13-001 Rev 2 Item 3.
Item Inspected: Raw Material for P/N 74684T-Stem, Traceability Code, TY4288103, HT Number X7U4, Manufacturer NAS, Country of Origin USA. Document to follow, API-6A-20th Edition-PSL-2.
Findings: Hardness Test, Specified Requirement, 262 to 311 Brinell, Actual as Reported on CMTR, 220-225 Brinell, Not in accordance with Material Specification WGT8.655.3.44 Rev 18 Section 7.4.2 from Vendor.
Re-inspection: Per Customer Disposition, referenced Raw Material has been rejected and segregated by Vendor and new raw material in Compliance with Project requirements has been purchased.
Benefits to Our Customer: By using Fraza Inspection Team, Customer saved a lot of of time and money preventing excessive expenses per back charges for Re-works at field site per unacceptable issues on Painting, Wrong Materials, Not Acceptable Results on Functional Tests, Dimensions, Not Acceptable Hardness and No Proper Machining/Threading process, if Not Corrected/Repaired in timely manner at Vendor Shop.